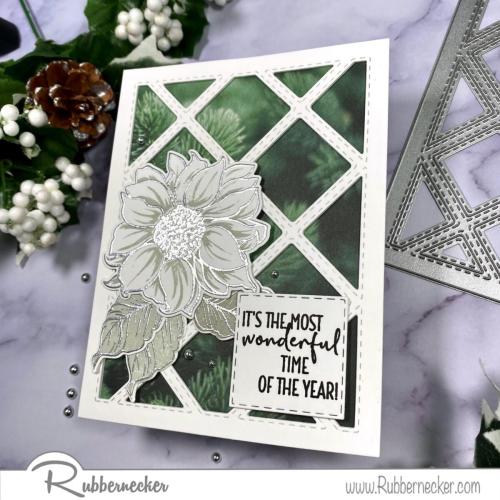
These DIY holiday cards are a stash buster’s delight!
So not only are these DIY holiday cards simply gorgeous, they can help you use up any variety of patterned papers with its simple, one piece peek-through die cut and a couple of die cut embellishments. Let’s take a look at how Carol created this for us.
First, she made her card base by cutting her patterned paper to card front sized and adhered it with her tape runner. PRO TIP: Because you are covering so much of this pattern up with the cover die cut, experiment with some of those papers you’ve never been able to figure out how to use. You might be surprised at how some of the ones you deemed “unusable” look when just a bit of their design is peeking through!
Then Carol used our Diamond With Stitch Cover die to cut a piece of white card stock three times, adhering the layers together with liquid glue and then adhered this over her patterned paper. PRO TIP: After you run this die through your machine, add some temporary tape to the backs of the diamonds to keep them in format for use on another card. Thanks, Carol – great idea!
Now Carol created her additional elements. Using her stamp positioner, she stamped the flower and leaf outline stamps from our Blossoms in Spring stamp set with Versamark ink and heat embossed with silver powder. (Bet you didn’t know that flower could stand in for a poinsettia!) She repeated the leaf stamping and embossing two more times. She then repeated the stamping and heat embossing with the flower center.
Next, still using her stamp positioner to get everything lined up beautifully, Carol stamped the detail layer of the flower using Silver Color Fuse ink from set #12. (She did not use the solid layer since she wanted her flower to remain white. For some more contrast and a little variety in shading, Carol then used the solid layer of the leaf stamp to stamp two of the leaves with Silver Color Fuse and one using Chill Color Fuse ink from the same set.
She then used the coordinating dies to cut everyone out, added a few foam squares to the back of the flower and added it to her card. She then adhered the leaves with liquid glue, tucking them under the edges of the petals.
Last, Carol stamped the sentiment from our Snowmen with Presents set in black on a scrap of white card stock, cut it out with one of the dies from our Nested Square Stitch dies and adhered it, aligned in the bottom right corner of the card with some additional dimensional adhesive. She finished this off with a teeny bit of bling in the form of a few silver metallic pearls.
Gorgeous! These particular DIY holiday cards are PERFECT for batch making! You can break up all the steps into different tasks and then have a giant assembly day. For instance, you can make all your card bases one night, do you cover die cutting and adhering another, stamp all your flowers and leaves, then spend another episode of your favorite show die cutting them, stamp and die cut all your greetings and then just put all your cards together as the last step and you will be ready!
Here are the items Carol used so if you love this idea, go ahead and get these things now and get ahead on your card making magic!

This card is proof positive that not all your DIY holiday cards have to be over the top. Make a big batch of these beauties to send to all your friend and family – they are stunning enough!


