Learn how to stamp a slimline background with a regular sized background stamp!
There are plenty of tricks for how to stamp a slimline background with a regular sized background stamp but sometimes you have a gap or worse, a visible overlap. Today’s trick from Carol is really clever and helps you avoid that even when you do something more complex like heat embossing! Let’s check it out!
First, Carol chose a background stamp with a random pattern to demonstrate this great tip. Once you get the hang of this and practice – more cards! – you can use stamps that have more rhythmic designs. Carol cut a piece of white card stock to 3-½” x 8-½” to fit her slimline card front and used her anti-static tool – so important when heat embossing! – over the whole surface. She placed this panel in her stamp positioner and stamped our Field of Stars over the bottom half with Versamark Ink and then heat embossed it with some white sparkle embossing powder.
Because the background stamp obviously isn’t long enough to cover the whole length of this piece, she turned it around in her stamp positioner and reinked the stamp with more Versmark. Now she covered her heat embossed area with a piece of printing paper – the thinner the better – and stamped up to the edge with the freshly inked stamp. See below:
So simple but so smart, right? This allows you to get right up to the edge of the stamped area so no gap but masks any overstamping so you don’t end up with a thick stripe down the middle! She repeated the heat embossing process and adhered to a slimline card base with some adhesive tape.
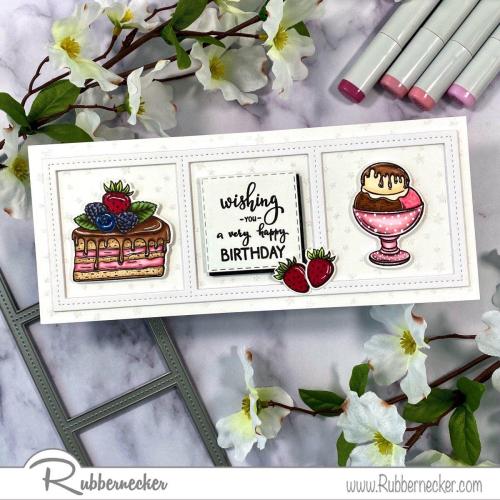
Next Carol cut our Slimline OPC (One Piece Cut) Squares die four times from white card stock and adhered these layers together with liquid glue and then added it to the card front when it was completely dry. This kind of stacking of identical die cuts creates a lovely, thick element that adds lots of emphasis and shadows.
Now that the basics of this card were done, Carol started on her decorative details. She stamped the images from our new Dessert Set with Copic-friendly ink and colored them in with her Copic markers and cut them out with the coordinating dies. She attached them to her card with some foam tape to enhance the depth offered by her die cut frame. Then she stamped her sentiment on a scrap of white card stock and cut it out with one of our Nested Square Stitch dies, using the same die to cut a square from black card stock. She adhered these two squares together, slightly offset, and added this too to the card front with more dimensional adhesive. She then “anchored” the greeting to the frame with her little strawberries.
Seriously “sweet”, right? Here are the goodies you will want to make this card yourself:

This is such a great tip for how to stamp a slimline background with your favorite standard sized background stamps. Give it a try and we bet you will be hooked on making these fun backgrounds!


