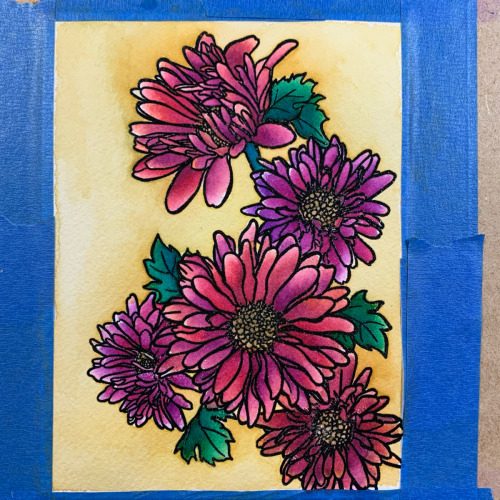
Use a simple masking technique to create a flower bouquet with stamps!
Today we are loving how Natasha shows us how to create a flower bouquet with stamps in a style similar to the one shown on our package. Lots of times you ask us “how’d you do that?” and we are so happy to have one of our fabulous Design Team members share the answer!
Let’s dive right in and see how easy and endlessly adaptable this simple technique is to do.
First, Natasha made some easy masks by stamping all the flowers from our Daisy Day Dream set onto Post-It notes. You can use masking paper if you have it but we’ve found we almost ALWAYS have Post-It notes around and they make excellent masks! PRO TIP: Save your masks in your stamp set container to reuse over and over.
Then, she stamped her images onto watercolor card stock, using her masks to cover stamped images that she wanted to look like they were IN FRONT of the others. To make sure that her watercoloring stayed where it belonged, Natasha did this stamping with the gorgeous Versafine Clair ink and heat embossed her design with clear powder.

PRO TIP: Tack your watercolor panels down to your surface to prevent the panel from any warping when it gets wet from your watercoloring. Natasha used some of our super vibrant, easy to use Ken Oliver Watercolor sets to color her flowers. She allowed each layer to dry before adding another which helps with preventing that pesky warping.

Once all her flowers in her beautiful bouquet were colored, Natasha added that beautiful moody shaded background with layers of yellow and gold watercolor and a touch of Color Fuse in Cinnamon to add those rich shadows.

When this beauty was completely dry, Natasha cut it out with our Nested Deckle Rectangle die and stamped the Happy Birthday from our Poetic Peonies with Versafine. She used our Wishes die and cut it twice from white card stock, adhering them together with liquid glue and then dabbed some Versamark over the bottom half of the front and heat embossed with gold powder. She also flicked a little gold metallic ink over her flower bouquet panel to echo the gold on the sentiment.
When everything was nice and dry, Natasha added her gorgeous stamped panel to her card base and added her word die cut under the stamped sentiment.

So pretty, right? And those beautiful layers of color – we just LOVE the look. Natasha shared with us that this is the first time she’d experimented with these particular watercolors and we say you would never know! She’s got an expert eye!
Here are all the fun things you will want to have out on your table to make this project:

Here’s another look:

Now that you have some tips on how to create a flower bouquet out of stamps aren’t you just itching to make some cards? Try mixing flowers, too – they are all designed to work together!

