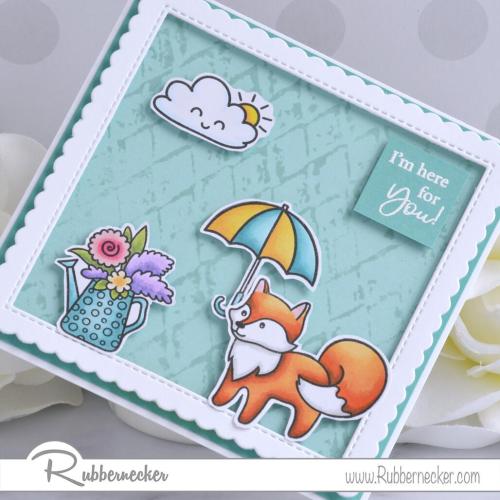
You will want to use this handmade square card idea over and over!
Today we have Annie to thank for this charming handmade square card idea that we can see changed up so many ways. Annie says “Even though it was meant to be a fall-themed stamp set, I thought the sweet images and flowers in the Autumn Fox Stamp Set made it perfect for spring too.”
We SO agree! We love that our Design Team shares so many projects that can be easily adapted to any occasion, use different themes or motifs, give lots of opportunities for different color combos and otherwise be so versatile as to keep us stamping for a long time!
As always, Annie is sharing all the details of the making of this square card so let’s get stamping!
Start by stamping the images from our Autumn Fox Stamp Set onto white card stock with black alcohol-friendly ink. Color them in with your favorite alcohol markers – Annie used her Tombow ABT Pro Markers – and then and fussy cut them with your paper snips. PRO TIP: When setting your images against a colored background, leave a narrow border of white around the image to help them pop.
Next, trim a piece of aqua card stock to about 4″ square. Apply Beachside Color Fuse Ink from Set #9 to our Distress Harlequin Background Stamp. Using a baby wipe, dab away some of the ink to create a distressed look before stamping the image onto the aqua panel.
Now, using our Square Combo #1 OPC Die cut a piece of white card stock, saving the largest frame. Save the extras in the container you use for the die for use on your future projects.
For the greeting, stamp your choice of sentiment onto a scrap of coordinating card stock – here, Annie used a teal slightly darker than her background – with Versamark ink and heat emboss with white powder to echo the white frame. Trim your sentiment nice and close.
Trim a piece of the same coordinating card stock you used for your sentiment to just a whisker under 4 ¼” adhere to a white top folding 4 ½” card base with your tape runner. Adhere your stamped background to the center with more tape. Adhere your white frame over the stamped panel with narrow pieces of dimensional adhesive.
Now arrange your precious little details on your card inside the frame and adhere them as you go with dimensional adhesive.
Could this BE any cuter????
Here are the items from our store that Annie used today on this sweet little square card:

It’s really fun to make cards in unexpected sized and shapes and this handmade square card idea is certainly one worth saving since there are so many ways it can be changed up. Try this design out with your own elements or grab what Annie used to make it the same way. No matter what, you know it will be appreciated!


