Our heat embossing on vellum tips will give you great results every time!
So not only did Dawn make this beautiful card for us to swoon over, she’s also sharing some excellent heat embossing on vellum tips that make this sometimes tricky technique SO much more successful. Dawns says “For the March theme of flowers I wanted to make a card that looked like lattice with vines and flowers growing on it.” She sure did! Let’s see how she did it an snatch up those tips!
Dawn starts by picking out all the dies she wants to use so she can cut everything at the same time. Today she grabbed our Mini Slimline Cover #3 which she used to cut a piece of white card stock, our Small Flowers #4 that she used to cut scraps of pinks and purples and our Small Ivy that she used to cut one shade of fresh green. PRO TIP: Dawn sorts her bitty die cuts into little containers so they don’t get accidentally swept off the table and are all in one spot for assembly time.

She sorted everything and set her little dishes aside to make her beautiful vellum sentiment panel.
Dawn cut her vellum to 3 ⅞” X 2 ¾”. This is larger than you need top to bottom and later you will see why – it’s one of her great tips. She placed this in her stamp positioner and before stamping, used one of her PRO TIPS.
Using an anti-static tool on card stock is a great way to keep random specks of powder off uninked areas of the material but it’s not always essential. When heat embossing on vellum you ALWAYS want to use your anti-static tool. Vellum is much smoother than most card stock so it is much more likely to hold static electricity. And, because it is semi-transparent, those errant specks really show up. Thanks, Dawn, for reminding/telling us about this!

Next Dawn stamped her choice of sentiments from our Faith and Scripture #3 set with Versamark. You want to make sure each letter is thoroughly inked to hold your powder; looking at the stamped surface as sideways as you can often lets you see where the areas are wet. If you need to re-stamp, the stamp positioner will let you do with with exact alignment.

Now on to another PRO TIP from Dawn. When stamping on vellum and anytime you have detail lines like with words, she recommends using ultra fine embossing powder. Again, because vellum is semi-transparent, details and definition are more prominent. Using the ultra fine powder means those teenier grains will fill in the fine lines and not the spaces in between!

Another hand PRO TIP from Dawn is to use a piece of white copy paper under your vellum when you are sprinkling over your powder. Not only is this a really easy way to get the excess back in the jar – just fold it in half and tap it all back in – the white background of the paper will show if you have any unpowdered spots and you can re-sprinkle to get thorough coverage.
Dawn’s next PRO TIP – and maybe the most important one! – is the best way to heat set your embossing power. Unlike with card stock, you can’t really just blast away. Because the fibers in vellum are so fine AND so tightly compressed, vellum will scorch much much faster than card stock. To prevent this project ruining instance, Dawn says to hold your heat tool further away from the vellum, move the heat around the surface more than you do with card stock to avoid hot spots and if your vellum starts to curl, heat from the other side and watch the curl disappear. It takes a little bit longer to heat emboss vellum but the results are worth it!
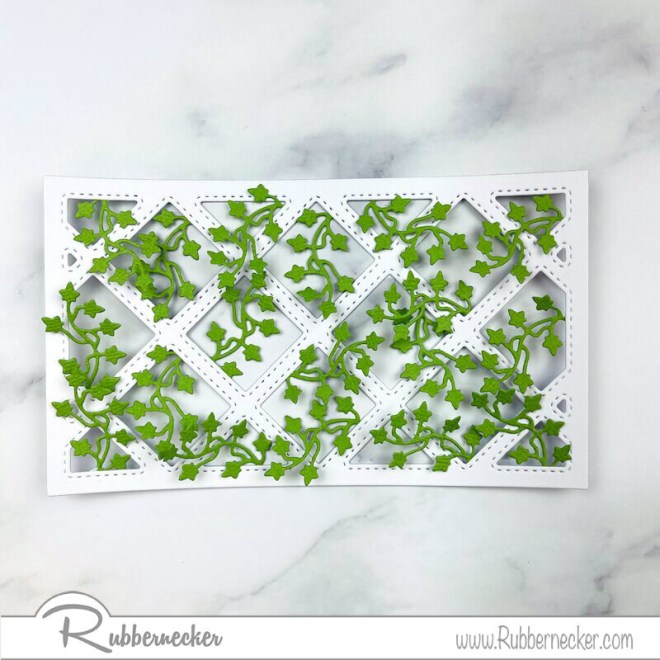
Once that piece was done, Dawn started to build her card. First, she added her ivy all over her lattice, tucking bits in and under the die cut. She adhered the ends to the back but didn’t stick down the pieces on the front to add lots of texture and dimension and spots to tuck her teeny flowers.
Here’s the front, looking like something right out a garden. (You will see the back in a bit in another step.)

Now Dawn added those tiny charming pops of color. Dawn uses microdot adhesive for bitty pieces like these; she just sets them down on the sheet of tiny adhesive specks and uses her nails or a pair of tweezers to pull them up, stack them together and then set them on her card.

Dawn added these little blossoms, making sure to add some under where the vellum would go so they could show through.
Now she took her heat embossed vellum panel and centered it side to side and top to bottom on her lattice panel. She then undertook her last PRO TIP which was to fold the excess vellum at the top and bottom over onto the back of the lattice and adhered it there. This prevents the adhesive from showing through on the front, letting that beautiful vellum “float” above the background.
Here’s the back of the panel where you can see how she stuck down the vellum and how she adhered her little vines.

All Dawn had left to do is adhere this gorgeous piece to a mini slimline card base and it was ready to go!

Here’s what Dawn used today to create this beauty:

We are so glad that Dawn shared these heat embossing on vellum tips because you can see what a stunning element this makes on a card. It’s sophisticated and elegant and perfect for cards where the sentiment plays a starring role but the background is just too beautiful not to show off. What do you think – are you more inclined to try this technique now that you have some foolproof tips?

