Today’s take on mixed media Fall cards for friends is a STUNNER!
Oooh – today we are so excited to share how Natasha created her mixed media Fall cards for friends – or for ANYONE just by switching out the die cut word! We love these kinds of cards because, based on what you use and how you use it, each card will be a little different which really frees you up to be creative. Natasha used lots of goodies from her stash, mixing older and new products from our store. We love this! We WANT you to use ALL your supplies!
Before we dive in to Natasha’s card we do want to say that we just restocked our Fall Pumpkins stamps and the die sets. We are SO thrilled that you all love these so much and are on top of the reordering – honestly, they don’t even have time to chat with the other stamps and dies they are out of here so fast!
Ok – on to this exquisite card….
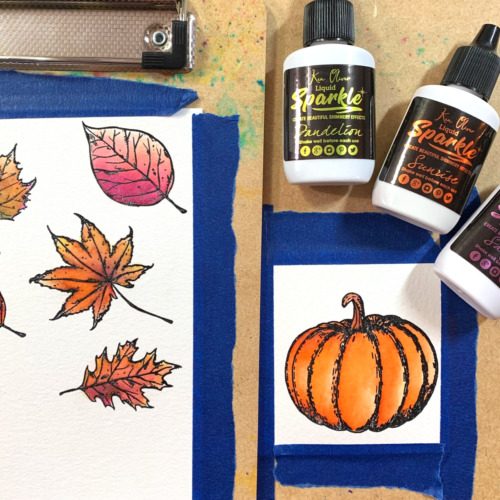
First, Natasha stamped the leaf images from our Splatter Leaves and Fall Pumpkins stamp sets with VersaFine and heat embossed with clear powder. She then water colored the images using ColorBurst powders by just adding a few drops of water to a little bit of the powder in a palette or on any non-porous, washable surface. She colored these up one layer at a time, allowing each layer to dry before painting over so that each color got to show itself off without mixing.
To add some subtle sparkle, Natasha also applied some Radiant Sparkles over her painted leaves.
Next she applied some of the powders to a glass surface and spritzed with water. PRO TIP: The finer the mist, the less “movement” there will be on the surface of any watercolor medium. She then “smooshed” – a HIGHLY technical term to us stampers! – a piece of watercolor paper over the watered ColorBursts. Natasha used her heat tool to dry each layer of application to again prevent any muddying and to let those colors pop on their own. When she was done, she spritzed the background to add even more dimension by the water moving some of the color.
Even though this was now striking all on its own, Natasha added even more delicious detail by first applying glitter paste through our Repeating Bricks stencil, placed at an angle, here and there. She allowed this to dry thoroughly and then splattered this piece with some metallic watercolors.

Once this dazzling panel was again completely dry, she cut it with the largest die from our Nested Deckle Rectangle set. PRO TIP: ALWAYS let your card stock of any type dry completely before die cutting. Our dies are designed to cut cleanly and evenly ever time. But if your material is wet or damp, the fibers will pull instead of cut and you could end up with a un-crisp cut.
Now Natasha stamped the sentiment from our Just Because Phrase set in the upper right corner of her colorful card panel. She then took our Friend Script With Shadow die and cut the shadow portion from a scrap of black card stock and the script several times from white card stock ad once from gold metallic card stock. She adhere the white portions together, topping with the gold piece and then adding this to her black shadow all with liquid glue. She also cut a few sprigs from some patterned paper with our Small Leaf Group die.
Natasha now assembled her card by attaching her water colored panel to a card base, adhered her die cut elements with liquid glue and foam squares and finished it off with a few gems for a little more light reflective sparkle. Gorgeous!
Here are the things Natasha used today:

Remember, you can swap out the words Natasha used on these mixed media Fall cards for friends to suit any occasion – it’s the beautiful mix of texture and dimension that makes these cards so striking. Go ahead and PLAY – it’s the best kind of creativity!


